
Let’s get started with MenuSweep!
We’ll walk you through the basics of setting up MenuSweep so you can get your locations, teams, and day-to-day operations organized quickly. Follow the steps in this guide to build your foundation and get your team ready to use MenuSweep.
We’ll walk you through the basics of setting up MenuSweep so you can get your locations, teams, and day-to-day operations organized quickly. Follow the steps in this guide to build your foundation and get your team ready to use MenuSweep.
TABLE OF CONTENTS
- Create Account
- Add Locations and Groups
- Invite Users
- Set Up Equipment and Sensors
- Set Up Dashboard
- Add Monitors
Create Account
Start by creating your MenuSweep account. Once your account is ready, you can begin adding your locations, inviting your team, and customizing MenuSweep for your business.
- Navigate to menusweep.daymarksafety.com.
- Click Create Account in the bottom right corner.
- Select Register with Microsoft to use your existing Microsoft credentials, or enter your information (Name, Email, and Password) and click to Create Account.
- You will receive an email asking you to confirm your email address. Click Confirm Email. The link will remain valid for 24 hours.
- Sign in using your created credentials.
You will be automatically set up under a 60-day free trial with the ability to configure up to 100 locations. To view information related to your free trial, navigate to Subscriptions in the left rail and then click on Free Trial.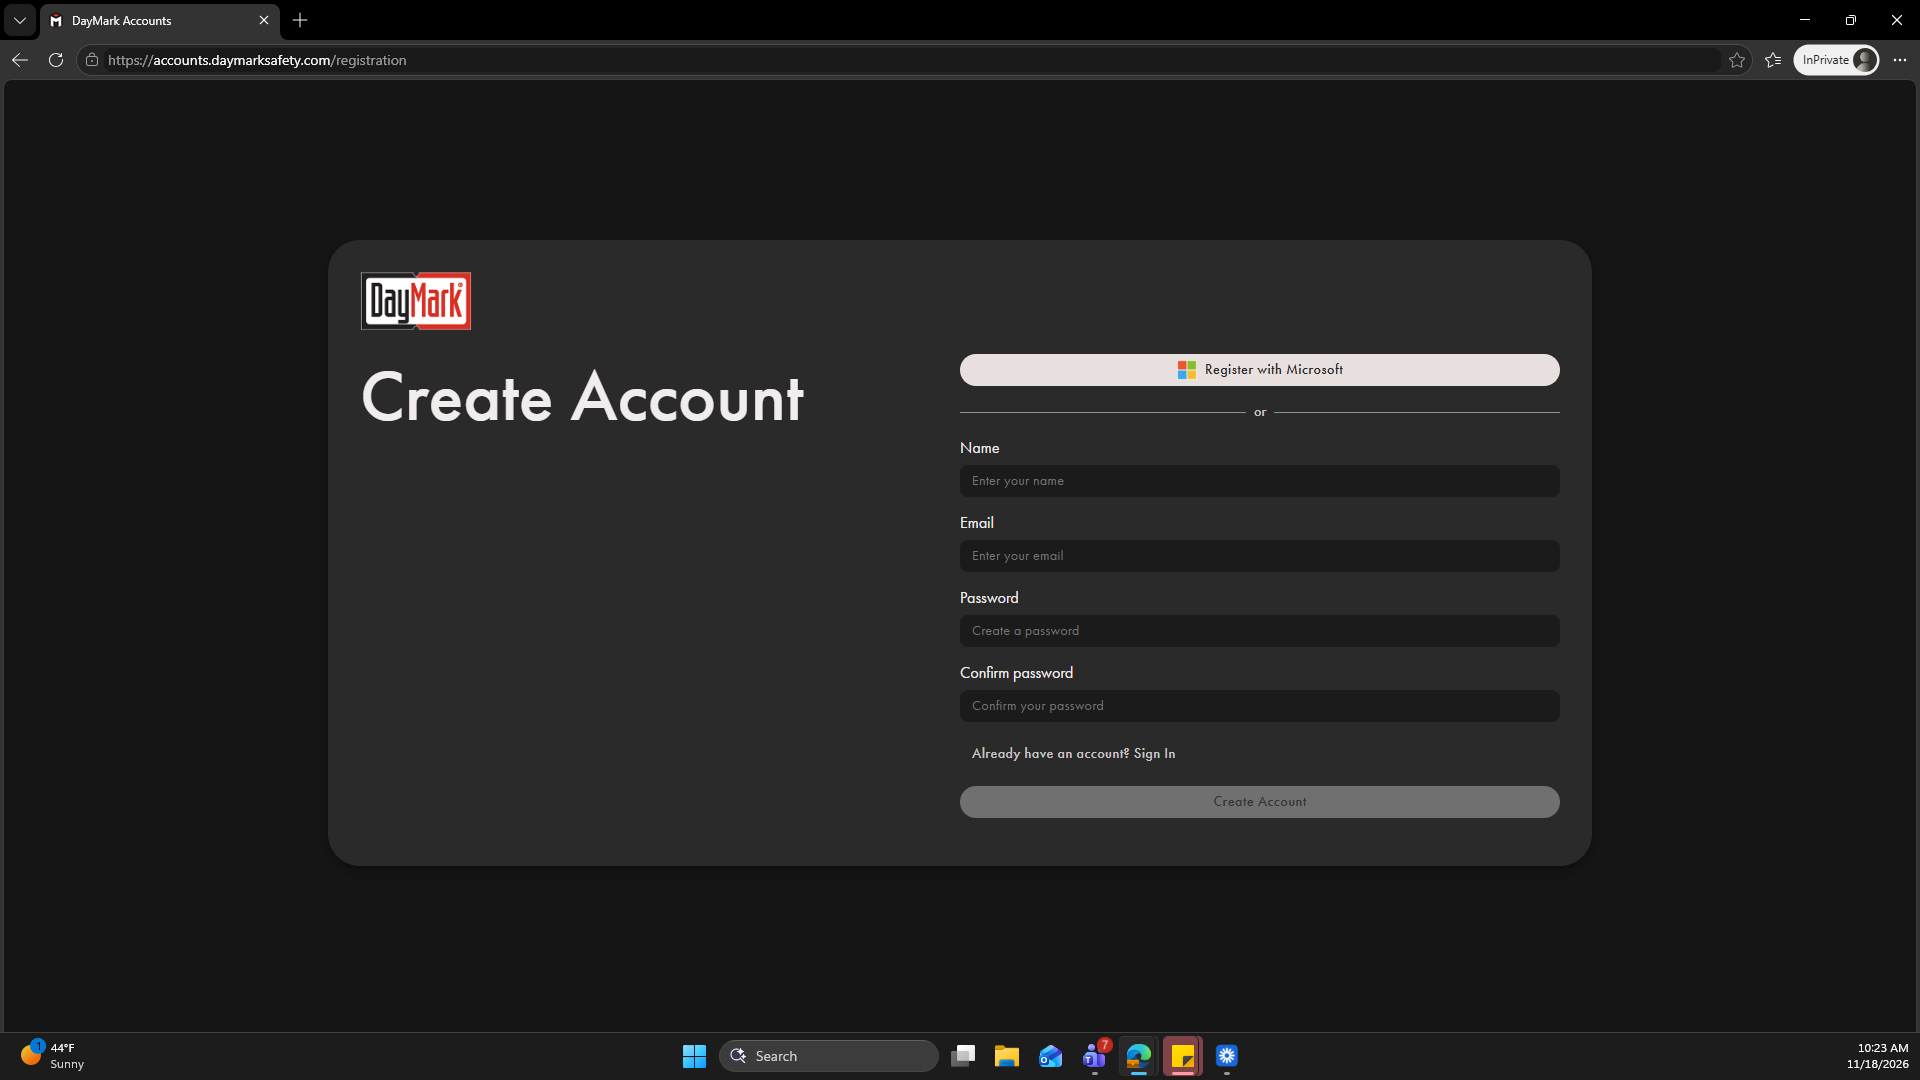
Add Locations and Groups
Add the individual locations that will use MenuSweep, then organize them into groups for easier management. Groups can be structured by region, franchise, business unit, or whatever makes the most sense for your organization.
If you already know the group structure you'd like to create, you can save some time by setting up your groups before adding your locations.Add New Location
- In Overview section, click +New Location.
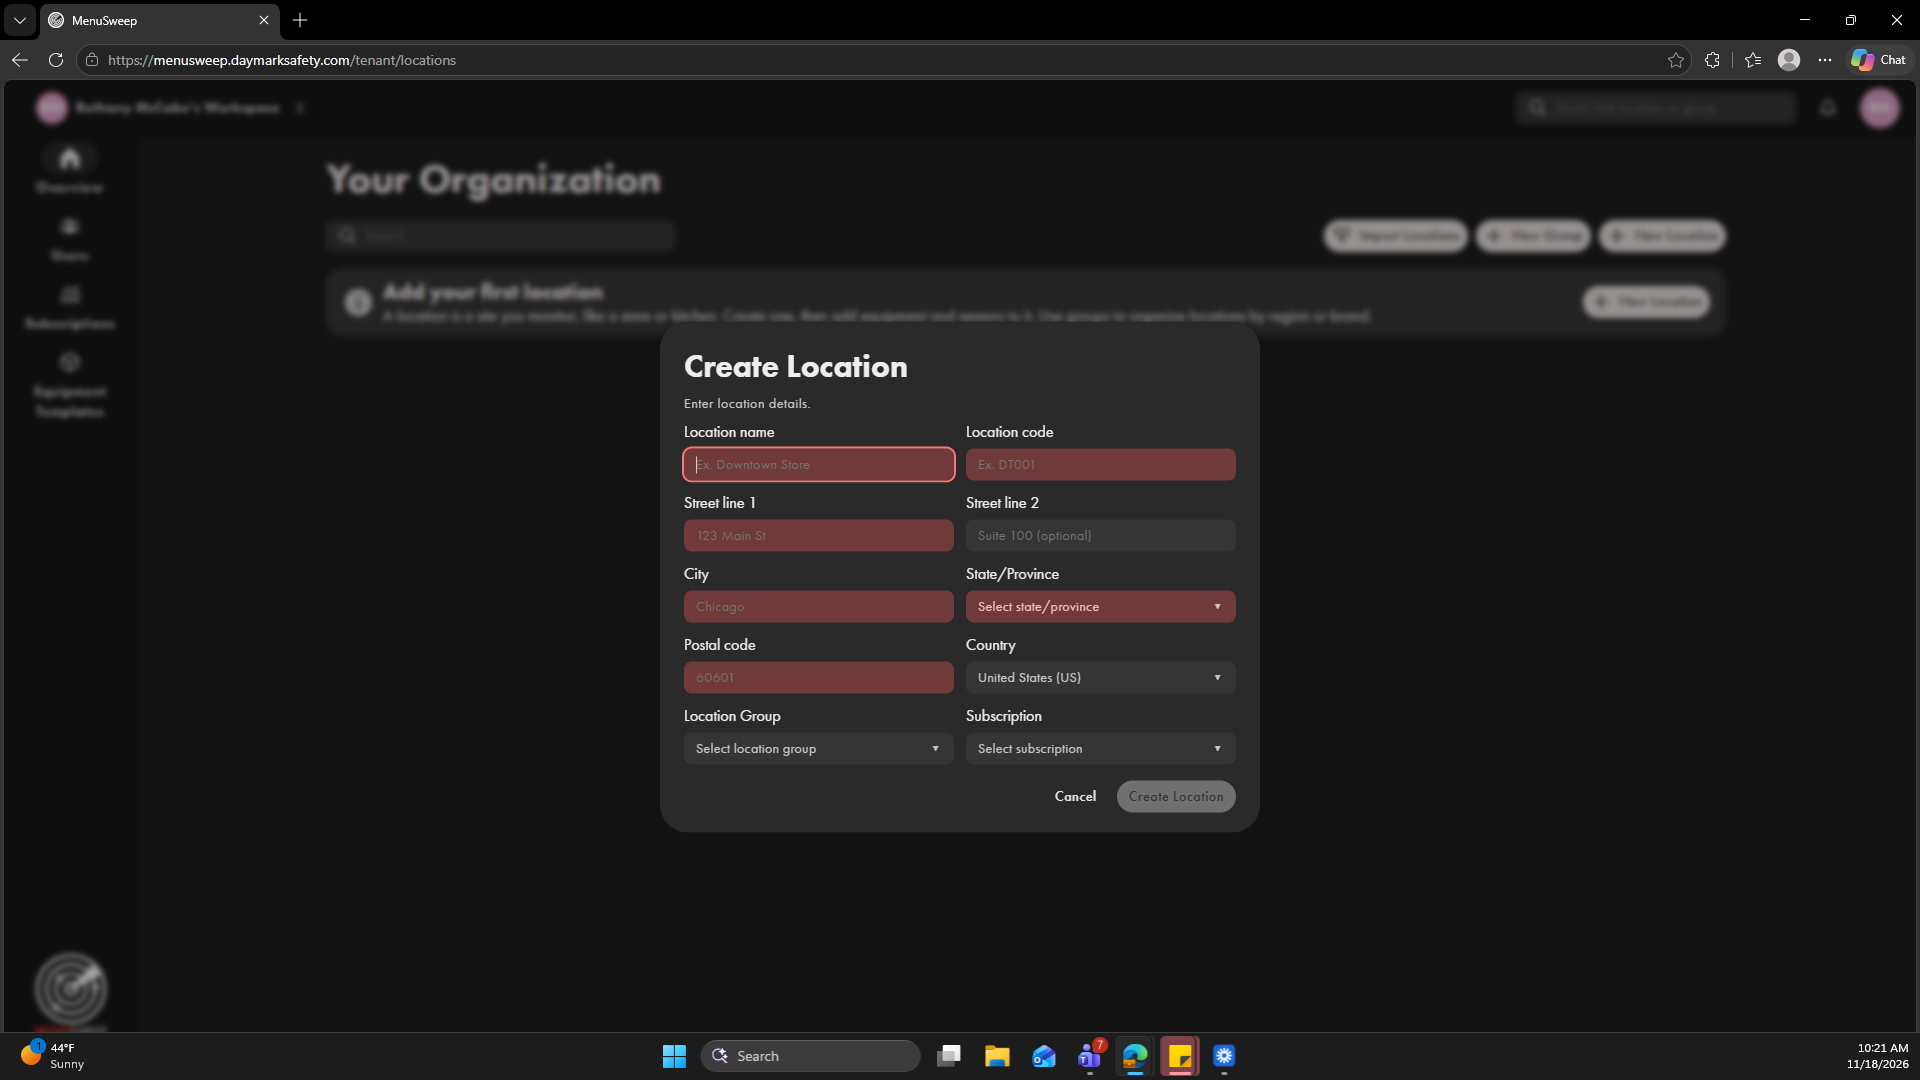
- Enter the details for your location, including name, unique identifier (Location Code), and address. This information helps you easily identify and manage each location in MenuSweep.
- You can choose to add the location to an existing group if you already have groups set up. Otherwise, you can move the location to a group at a later point in time.
- Map the location to your free trial subscription if you'd like to activate it using your free trial location allotment.
- Click Create Location.
Add New Group
- In Overview section, click +New Group.
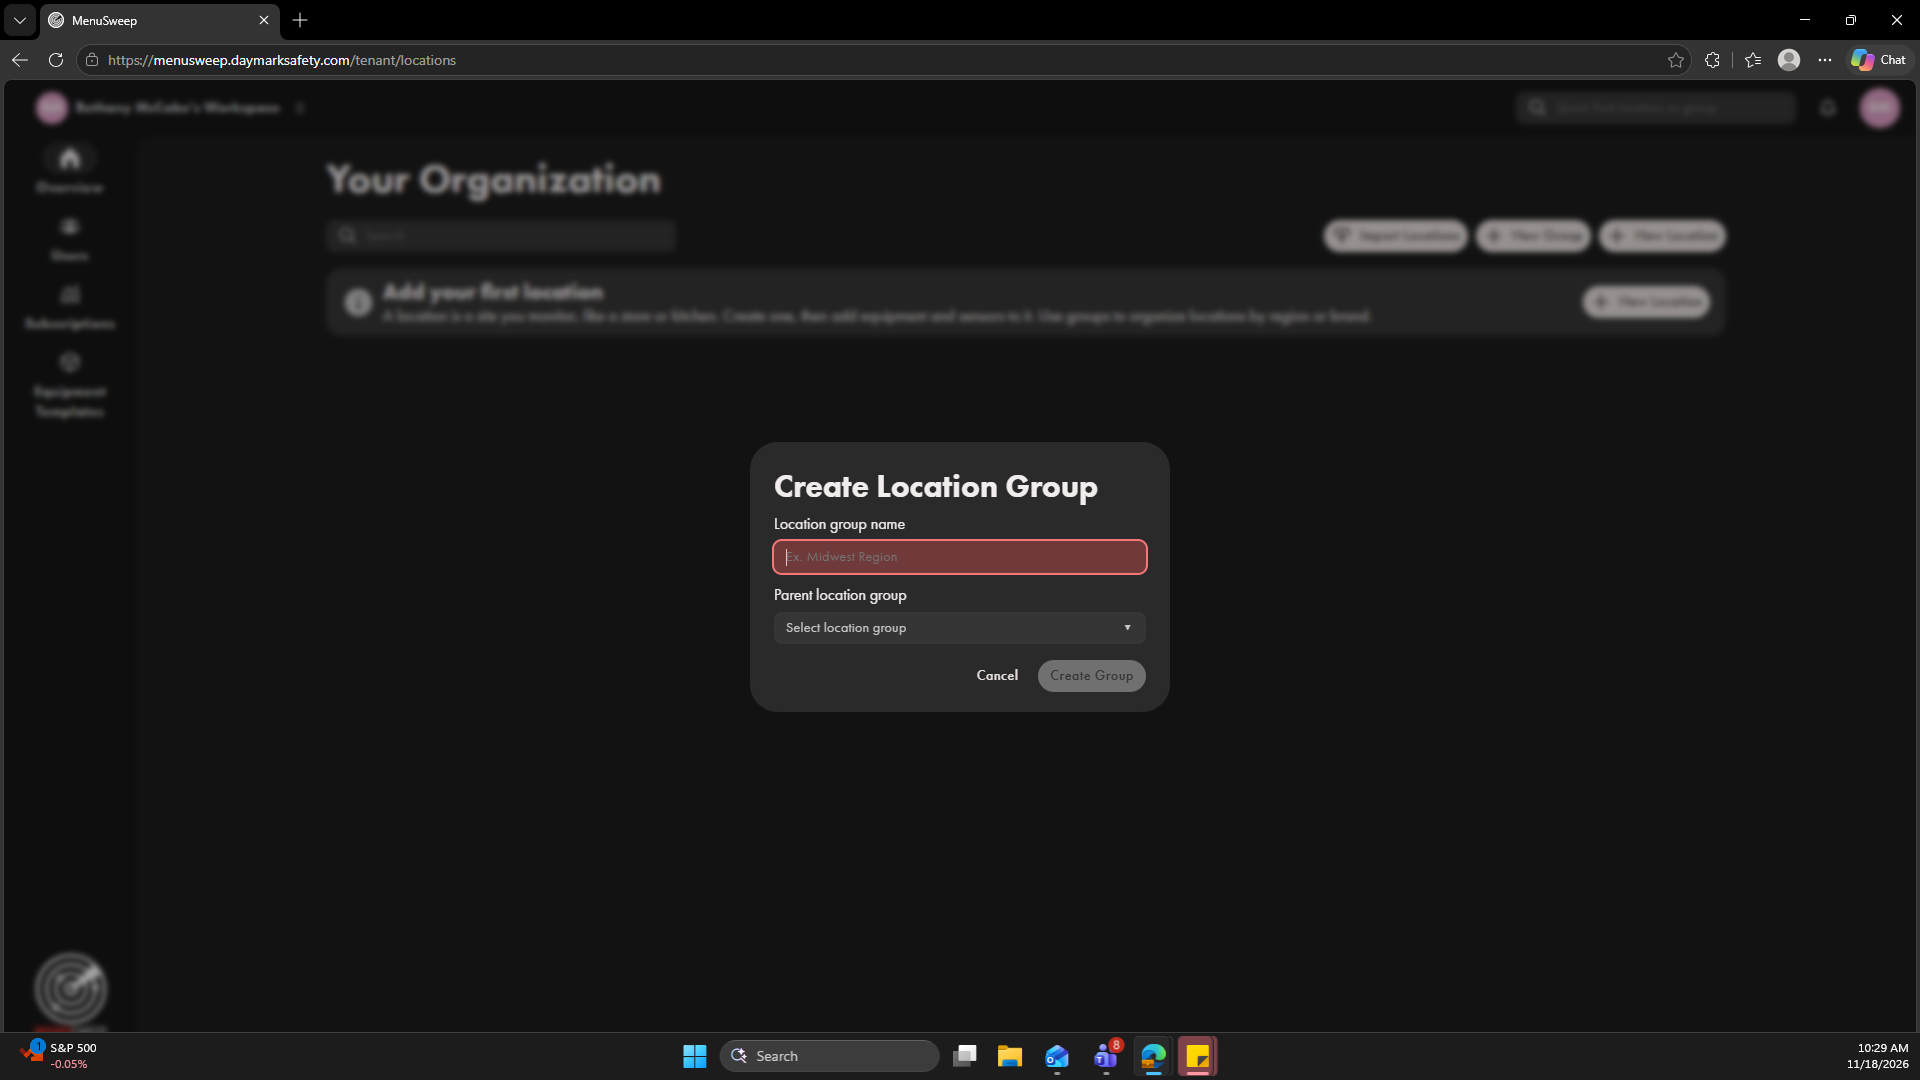
- Enter the group name.
- You can choose to add the group to a parent group if desired. Otherwise, you can always move this group at a later point in time.
- Click Create Group
To move a location or group that was already created, click the three dots next to the location or group you'd like to move and select Move to Group. Select the group and click Confirm.
Invite Users
Invite users to MenuSweep and choose the access that fits their role. Users can be added at the account level for access across the organization or assigned to a specific location if they only need access to that site. In this Get Started guide, we will cover how to add users at the account level.
- Navigate to Users on the left rail.
- Click +Invite User.
- Enter their Email and select the applicable Organization Role.
- Click Send Invite. The invited user will have to click the link in the received email to finish setting up their credentials.
Owner is the original creator of the account and has full control of the organization. Admin has full access to the organization. Viewer only has view permissions and will not be able to make changes.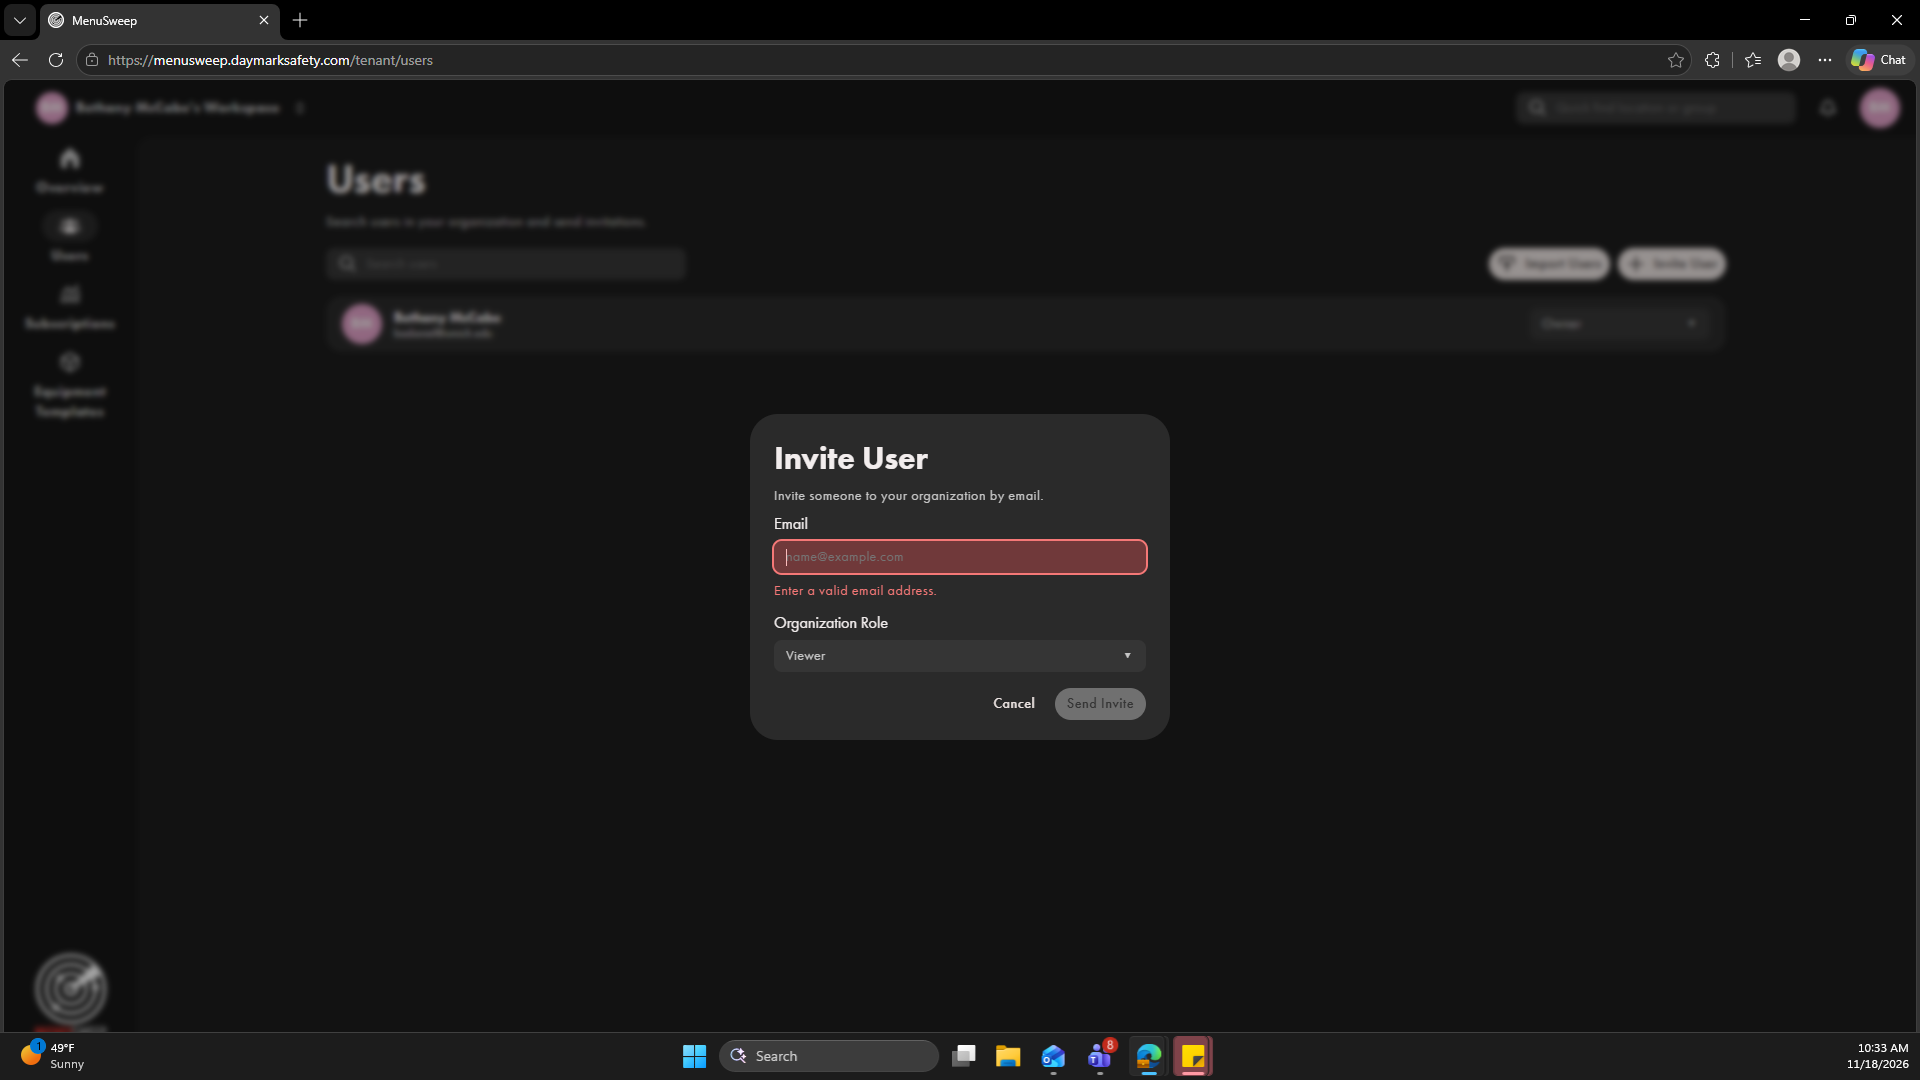
To invite users to only a specific location, please refer to the following article <insert link>Set Up Equipment and Sensors
Equipment templates let you preconfigure the metrics and data points you want to monitor for specific types of equipment. Create a template once, then use it to quickly and consistently set up similar equipment across your locations. Add and assign your sensors to the equipment they'll be monitoring. Once connected, you'll be ready to start tracking conditions and managing your devices from one place.
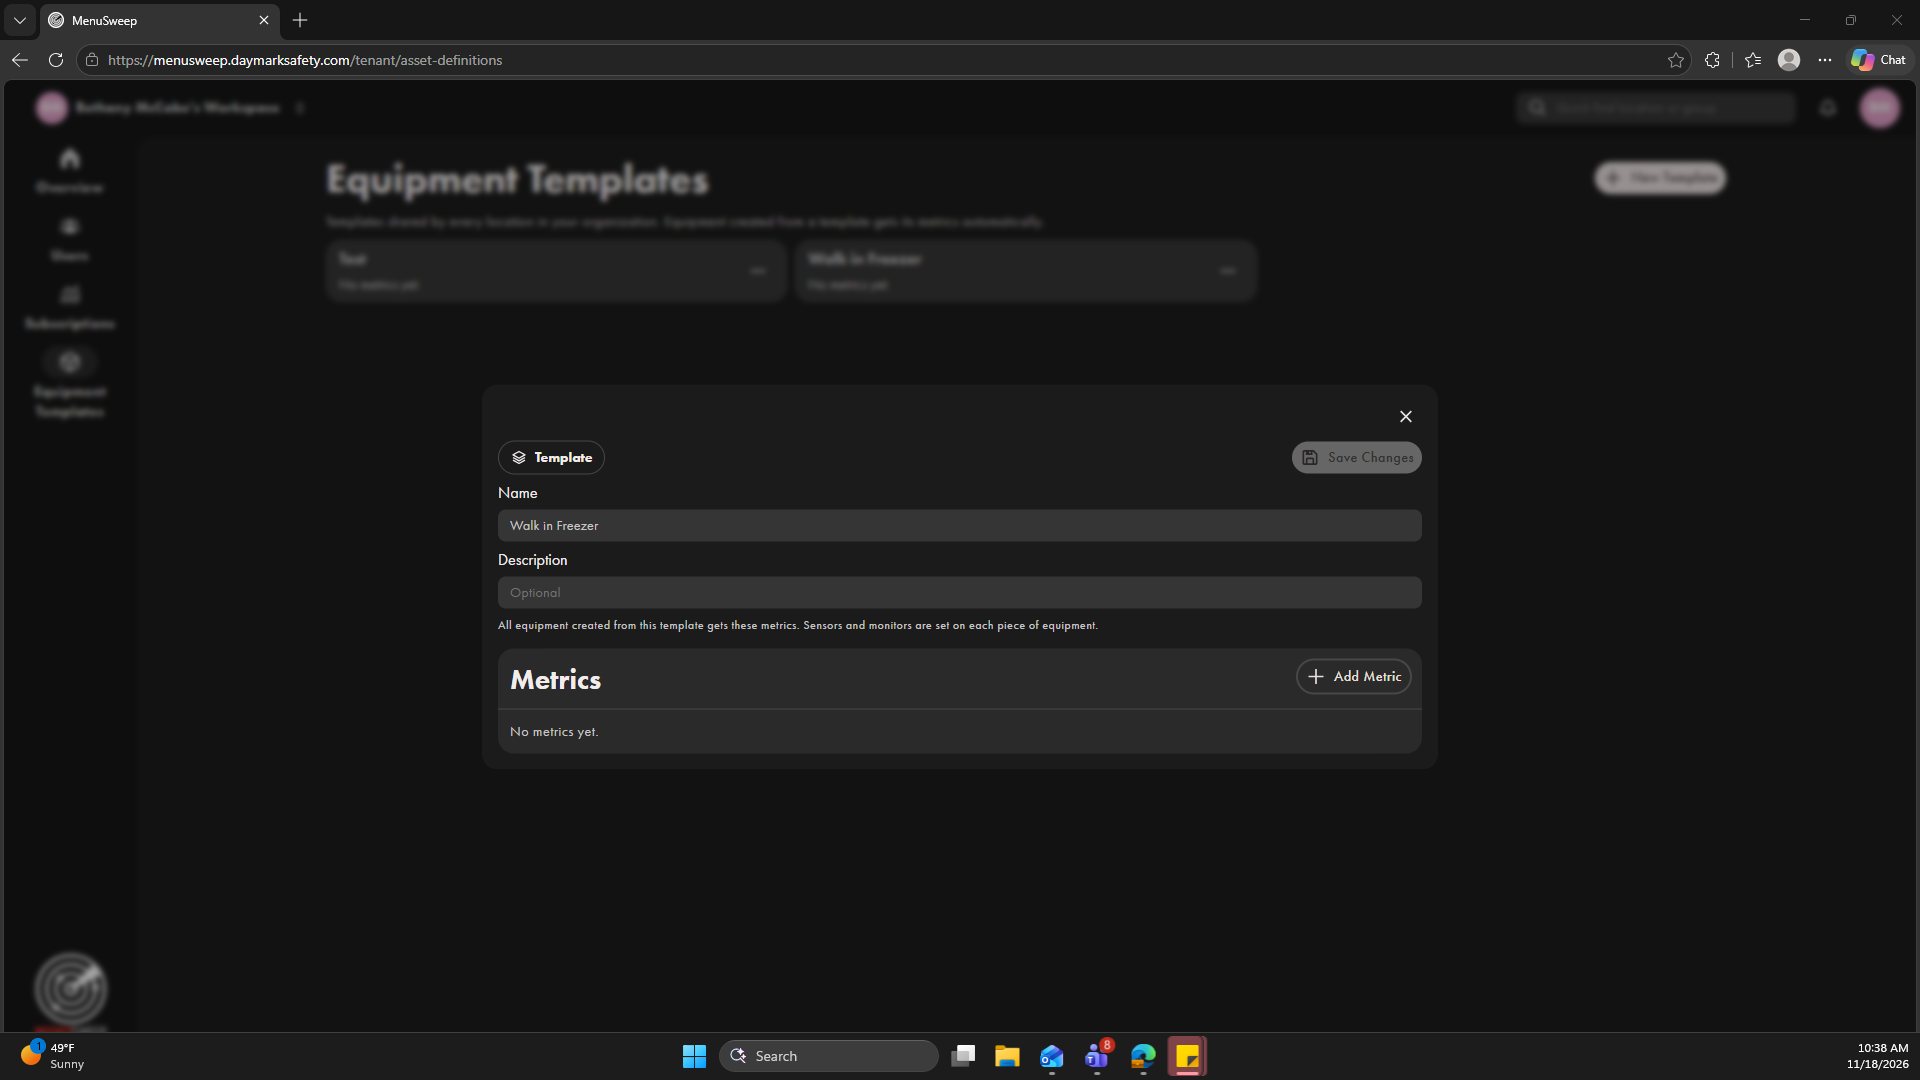
Configure Equipment Templates
- Navigate to Equipment Templates in the left rail.
- Click +New Template.
- Enter a Name to describe the type of equipment being monitored and optionally add a Description.
- Click Create Template.
- In the Metrics section, click +Add Metric.
- Enter a Metric Name.
- Select the Metric that you'd like to be added for this equipment type.
- Check the Required option if this metric is not considered optional for this equipment type.
- Add other metrics as needed for this equipment type and then click Save Changes.
Add Equipment
- In Overview section, click into the particular location to add a particular piece of equipment.
- Navigate to Equipment & Sensors in the left rail.
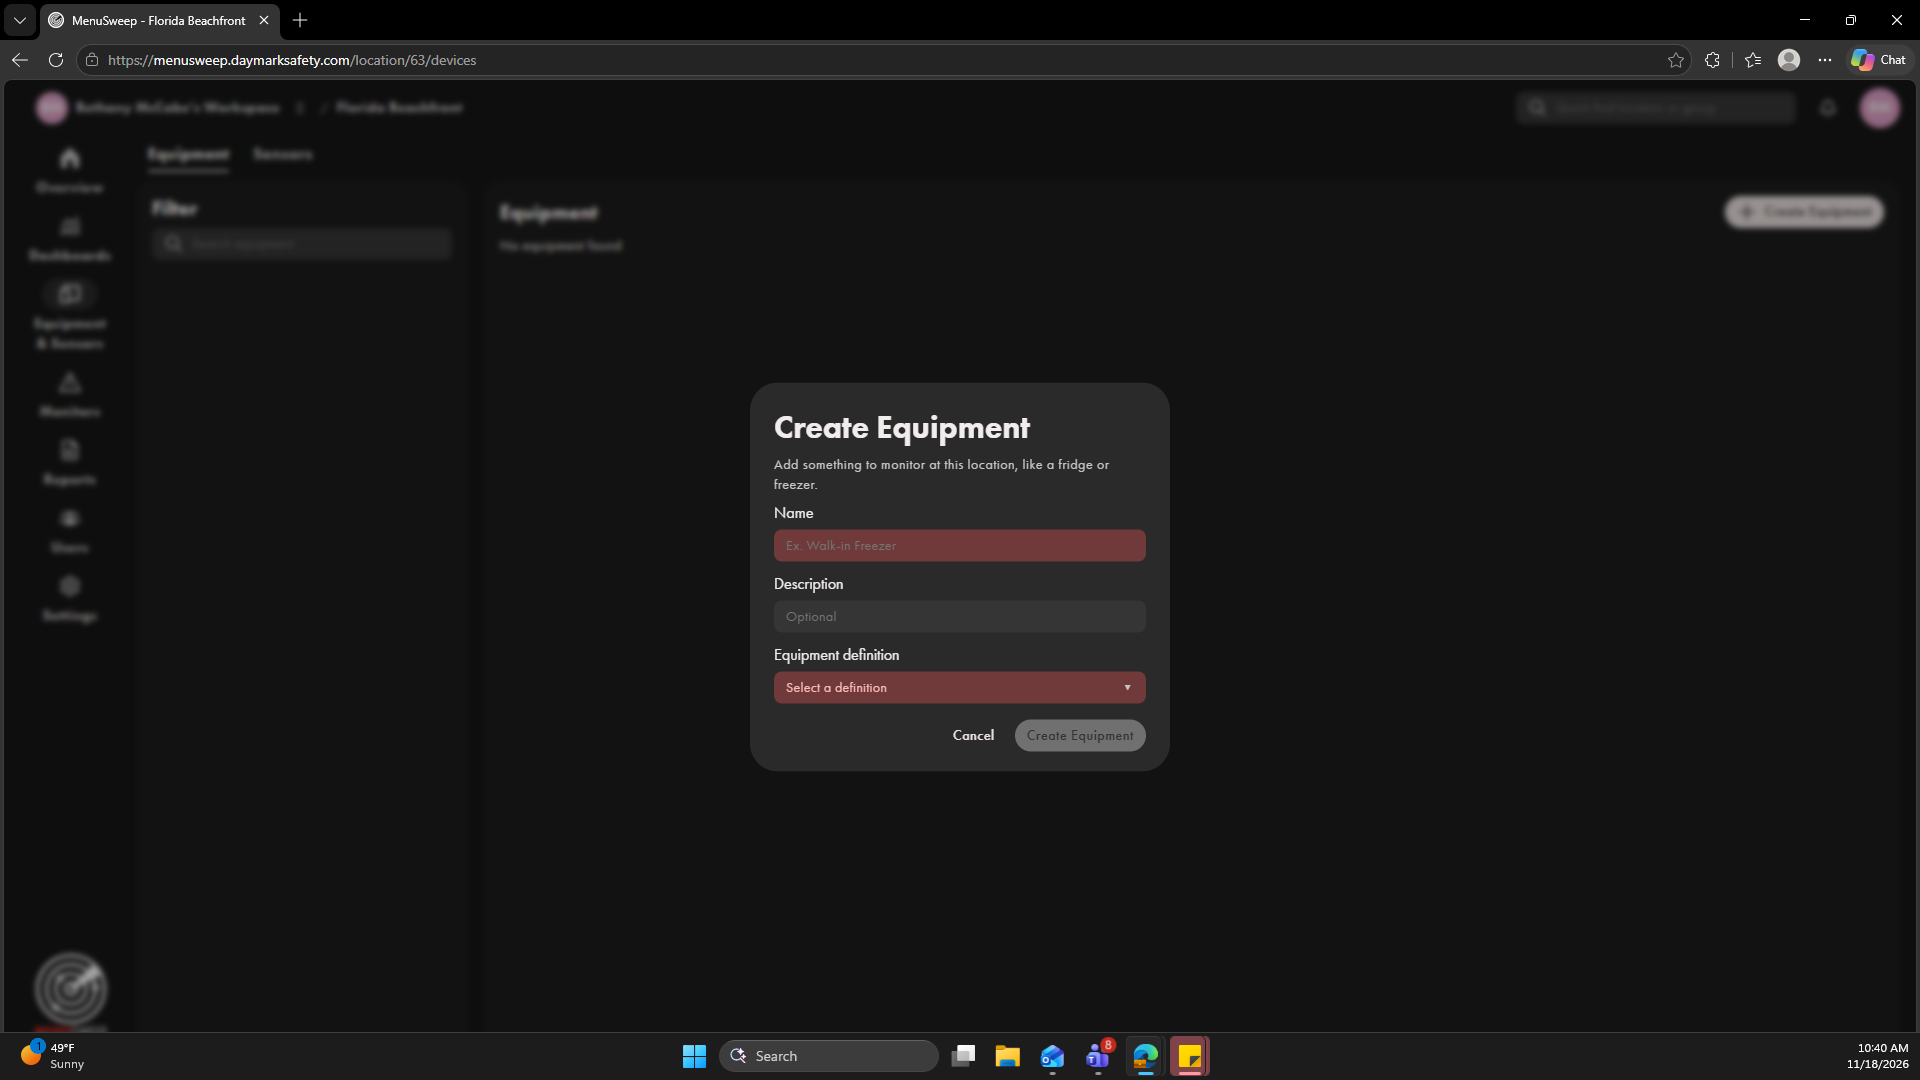
- Under the Equipment tab, click Create Equipment.
- Enter a Name for the equipment that will be easily identifiable and optionally add a Description.
- Select the appropriate Equipment Template to automatically apply the preconfigured metrics to that equipment.
- Click Create Equipment.
Add Sensors
Please ensure you follow the additional steps included in the Quick Connect Guides to ensure your Gateway and Temperature/Humidity sensor are powered on and activated.
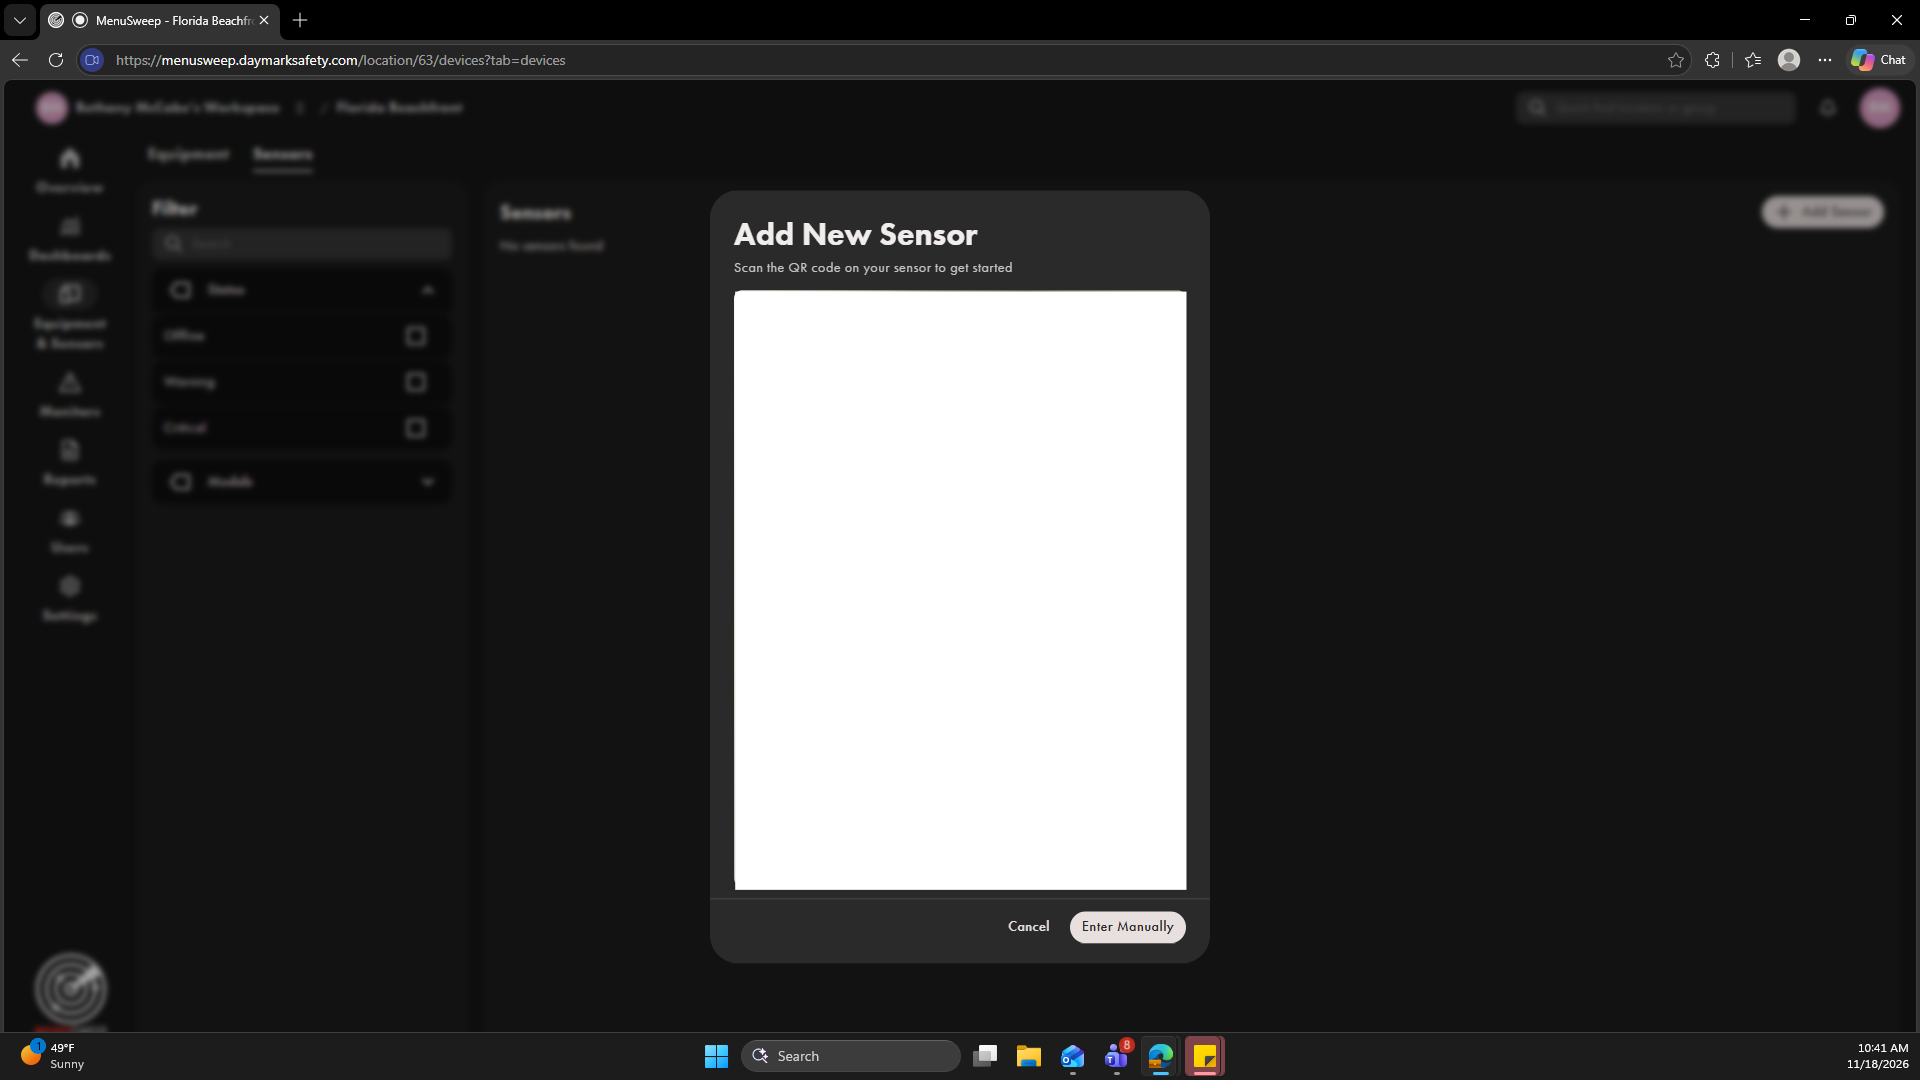
- Under the Sensors tab, click Add Sensor.
- Scan the Daymark QR code on the back of your device or click Enter Manually to enter the Sensor EUI and PIN.
- Input a Name that will help you identify the sensor and click Next.
Skip adding monitors to the sensor. We will cover this in a subsequent section.
Review the information summarized and click Add Sensor. The named sensor will now show up in the Sensors list and will be available to be added to any dashboard.
Set Up Dashboard
Create a customized dashboard to visualize your sensor data in one place. Choose the equipment and data points you want to display to easily track conditions, identify trends, and stay informed about your operations. Create monitors to trigger alarms when specified thresholds are met.
Create Dashboard
- In Overview section, click into the particular location.
- Navigate to Dashboards in the left rail.
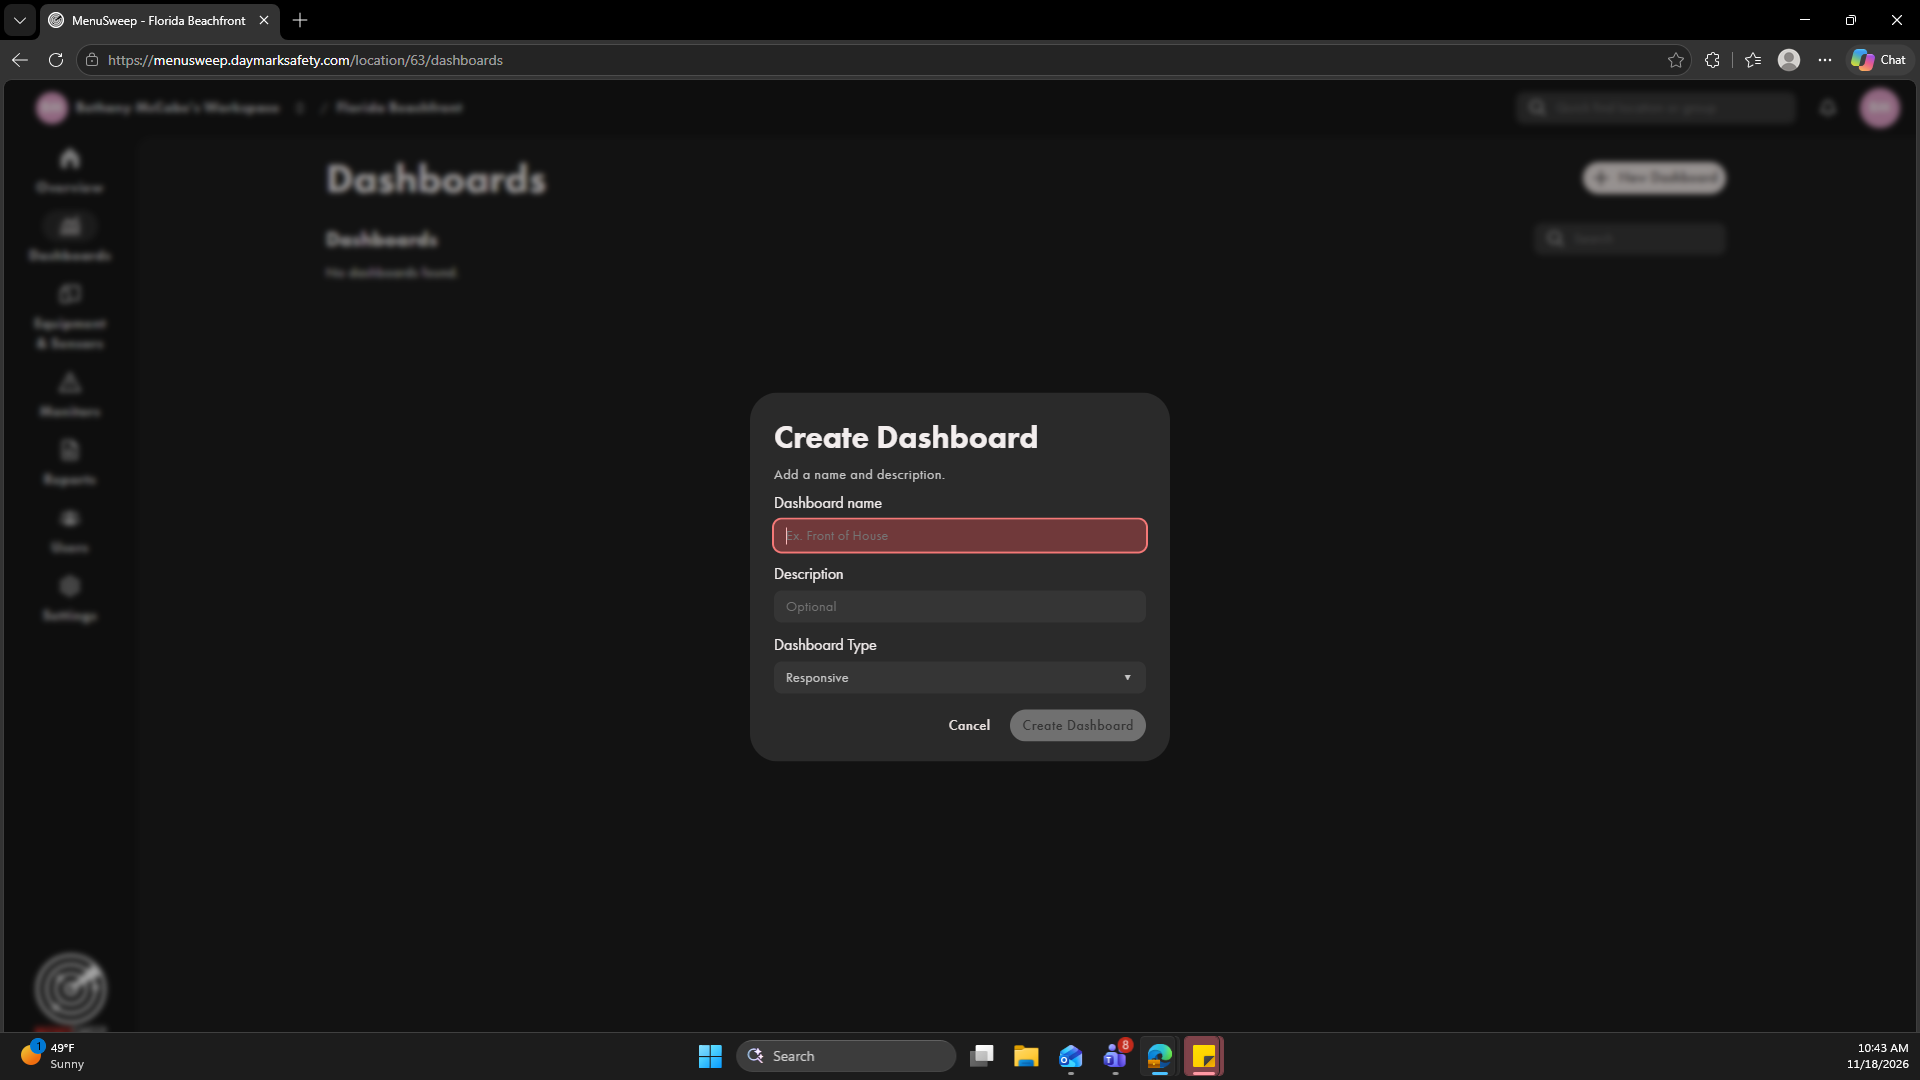
- Click +New Dashboard.
- Enter a Name for the dashboard and optionally add a Description.
- Select the appropriate Dashboard Type. When Responsive is selected, the dashboard will automatically adjust its layout to fit different screen sizes and devices. Fixed means that the dashboard will maintain its layout regardless of screen size.
- Click Create Dashboard.
Add Widgets
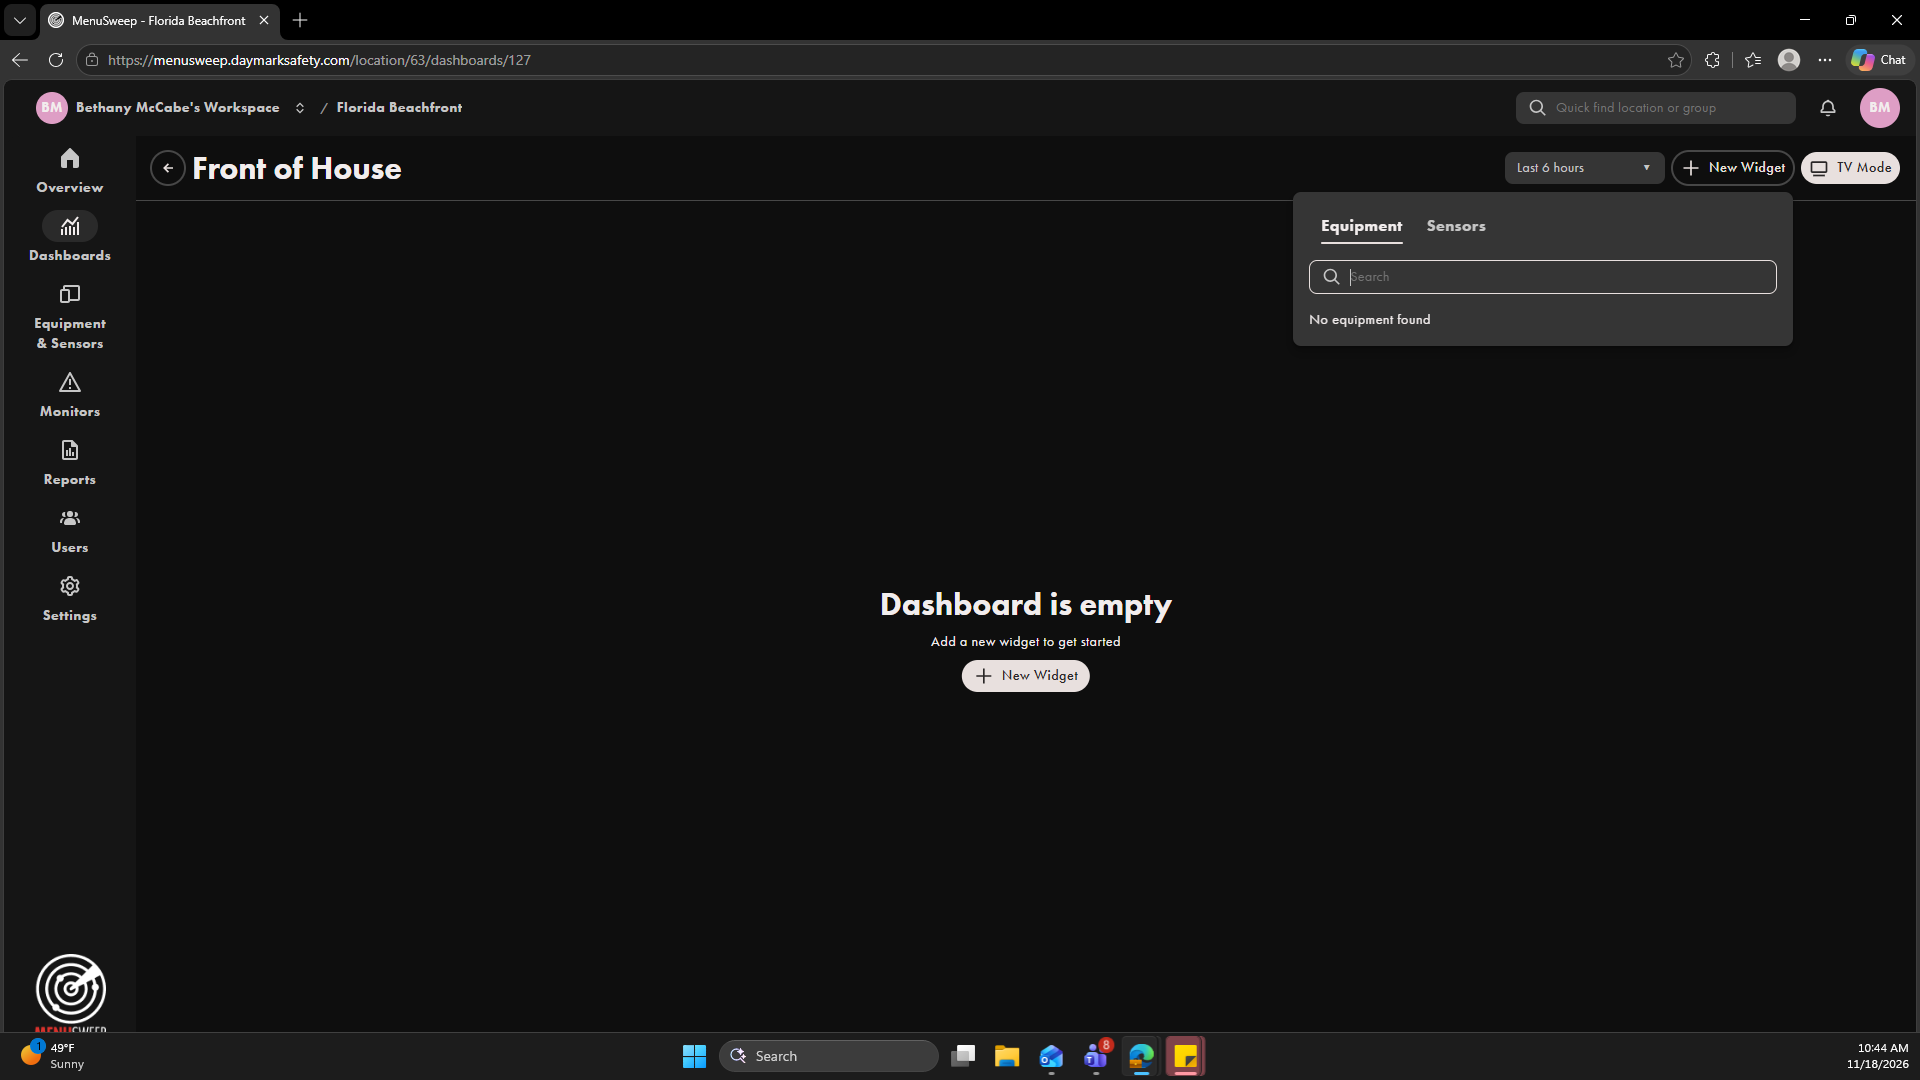
- To add a visual, click +New Widget.
- Available equipment and sensors will appear in the dropdown. Select the item you'd like to add to the dashboard.
- On the widget, click Use Default to use the prebuilt design or click +Add Visual to configure as you'd like.
- Choose between visual types - Readings, Line Chart, Bar Chart, Timeline, and Gauge.
- Select Metric of the options provided in the dropdown.
- Add Color Rules to highlight values that meet your criteria.
- Select any of the available options to configure your visual.
- Click the back button on the popup.
- Under Settings for the widget, click Edit Title to give the widget a name.
- Click Save Changes in the upper right corner to save the updated dashboard.
Add Monitors
Keep an eye on what matters most by setting up monitors for your equipment. Define your acceptable limits and let MenuSweep notify you when measurements reach those thresholds so your team can respond quickly.
- Navigate to Monitors in the left rail.
- Click +Create New Monitor.
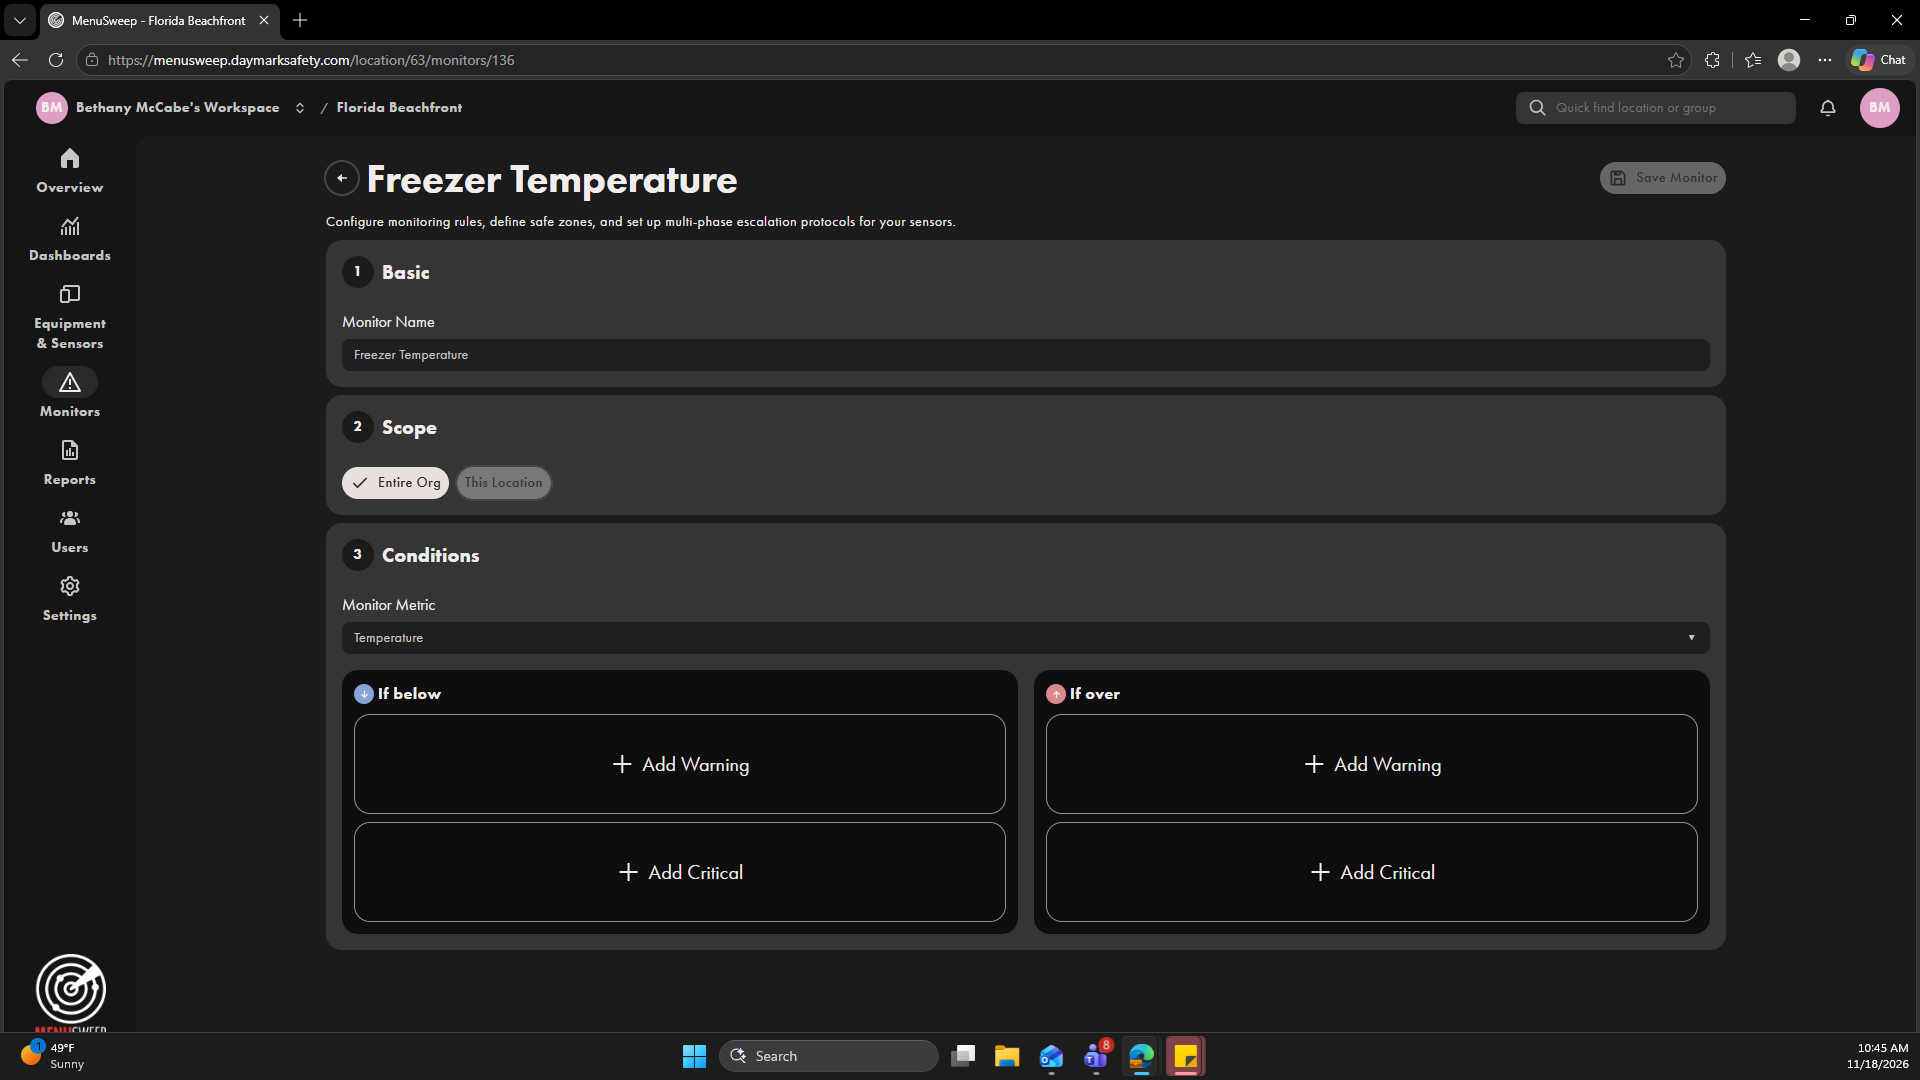
- Enter a Name for the Monitor and select the Metric that it watches.
- Click Create Monitor.
- Select the Scope, whether the monitor should be available to the entire organization or just this location.
- Specify the Conditions by which the monitor should alarm. You can set up Warnings and Critical Alarms as needed.
- Click +Warning or +Critical.
- Configure a threshold value for the alarm.
- Choose to delay the alarm until the specified conditions are met for a specified period of time using the Trigger After feature to avoid unnecessary alarm fatigue.
- Click + to add an Automated Action.
- Choose Email and enter a Subject, To, and Body for when the alarm is triggered. You can also choose to set up an email for when the alarm is resolved.
- Click Save.
- Turn on Auto-Resolve if you would like the alarm to resolve automatically without human intervention if condition is stable for a specified time interval.
- Once configuration is complete, click Save Monitor in the top right.

Congratulations, you are now through the basics of MenuSweep!
If you have any questions or issues, you can refer to the rest of our help documentation for more detailed feature walkthroughs or contact our support team techsupport@daymarksafety.com.